I remember the good old days of the internet, with websites that would scare you with random midi music suddenly playing in the background and lots of crazy gifs, not to mention the backgrounds (go away with your flat design). I was amazed about the idea of having my own website, but I was a young child that didn’t fully understand how the internet worked.
Fastfoward to today and I am a grown adult that works with IT. I decided it was time to finally go after that dream…this blog is that very dream becoming true. I did struggle I little with the configs, so I am sharing with you the proper steps to host your own server and – more importantly – how to make it available to the world.
No need for expensive online hosts, you can do from your home and the only cost will be your domain registration (and the power bill of your server, of course).
Theory
You are connected to the internet and you probably have and old computer which you are not using, or you have a nice home-lab, there are two challenges we need to overcome in order to make it work:
- Exposing anything to the internet is dangerous
- We need a certificate to use HTTPS
- We need port 443 to be exposed from our server to the internet, but your home ISP probably blocks port 443, which is used by HTTPS (there’s usually an additional charge to use this port and some providers require a business internet to allow it)
Luckily, today there are lots of tools we can use to overcome those challenges. Doing my research, the best option I found was Cloudfare’s Zero Trust. In its free tier, it offers everything we need to overcome the 3 challenges we have. It works by creating a secure tunnel between a server and Cloudfare’s network and then you can use Cloudfare DNS to tell the entire internet to reach your site over Cloudfare’s server. The clients never reach to your actual IP. Cloudfare will be the middleman and every user will reach the server across it, not only that, but they will provide a TLS certificate for HTTPS free of charge! As for your home network, you don’t have to worry about firewall, NAT and your ISP limitations because the tunnel will be an outgoing connection from your internet connection.
How to:
OK, know that we understand the basis of what we are doing, let’s get started:
What you will need?
- A server to host your page (here you can find a tutorial to launch a WordPress server)
- A domain name (if you don’t have one, I highly recommend you get it from Cloud fare)
- A free tier Cloudfare account
Create a Cloudfare account:
First step is to create a free Cloudfare account, once you are done, you have to register a domain (this is the only part in which you have to pay something). O the left bar, select Domain Registration:
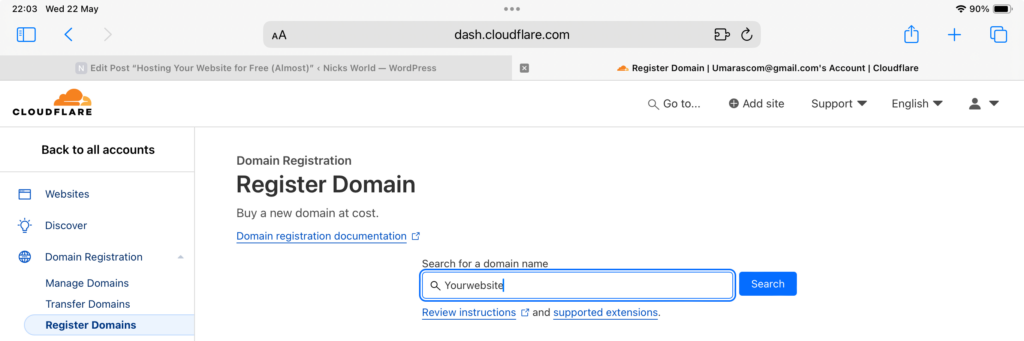
Type a domain name you would like and click search, this will be your website address. Prices will vary, keep in mind that you’ll have to pay it yearly in order to keep using it. Mine was 8 bucks/year! Just follow the steps for payment. Once you are done, your domain will appear on the Manage Domains tab.
Head over to the Websites tab